


Curtains are an important feature in any room so it's important you hang them properly. We've put together this simple guide to help you choose the correct curtain hardware to hang your curtains.
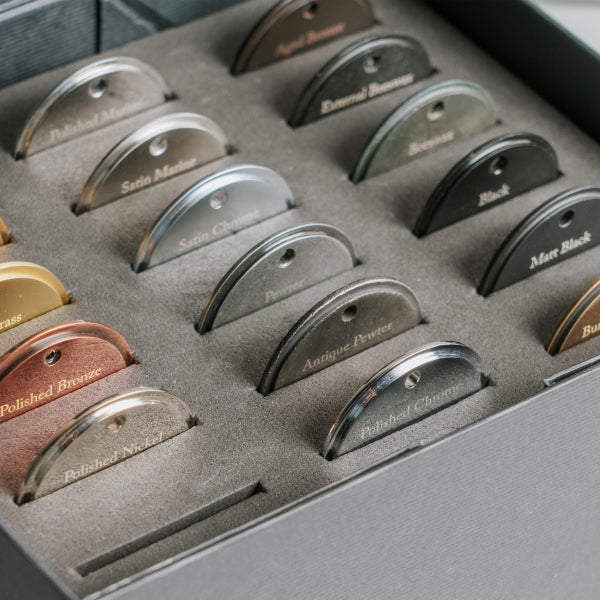
The first thing to consider is the quality of your curtain hardware. Sturdy brackets and curtain poles are essential to support the weight of your curtains for years to come. Hardware forged from mild steel is a great option as it won't bend or warp, even when fitted with the heaviest sets of curtains. Pewter, Black, and Beeswax are all wonderful finishes to consider.
Curtain Hardware Explained
Most curtains hang on curtain rings. These rings can either be built into the curtains (known as eyelet curtains) or purchased separately for pleated curtains. Curtain rings will often be selected in a matching finish to the curtain pole itself. When using curtain rings, we suggest using four rings per 300mm of curtain pole - this creates a nice sized pleat without crumpling or stretching the curtain too far.

Above: pink curtains hung using From The Anvil's Beeswax curtain pole, curtain rings, mounting brackets, and round Ball curtain finials.
Curtain rings slide along a curtain pole. Curtain poles are secured using curtain brackets. Typically, one bracket is used on either end, but for longer curtain poles its advised to add a third bracket in the centre to aid weight bearing. We sell From The Anvil curtain poles in 1m, 1.5m, and 2m lengths. If you require a longer curtain pole, you can use an aluminium joining bar to fit two poles together (you can cut these to your desired length). When joining multiple poles, make sure you use a bracket at the join.
Curtain finials are fitted to either end of the curtain pole to anchor the curtain, ensuring it doesn't slide off the end. Curtain finials are also an opportunity to express your personal style as there are many ornate designs to choose from. One of the most popular designs is From The Anvil's Ball finials - choose these in a matching finish to your curtain pole for a cohesive look. Secure into place by tightening grub screws on either end of the pole.

You may also decide to use curtain tiebacks to hold your curtains neatly in place at the side of your windows when open. These are designed to complement your curtain finials and can be fitted to your wall to tidy the look of your curtains.

Different Types of Curtain Headings
We briefly mentioned that there are different types of curtain headings and the type you choose will depend on your interior.
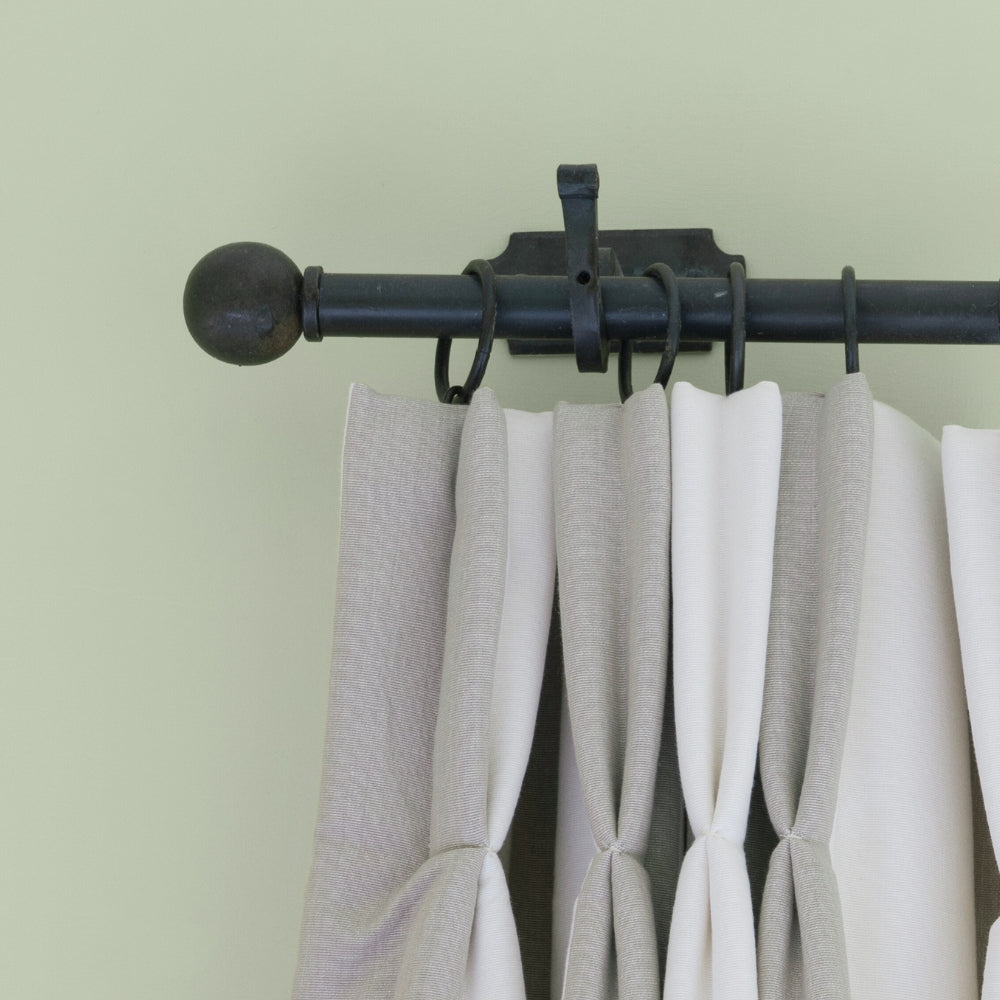
- Pleated curtains - this highly decorative style of curtain heading is created by gathering lots of fabric together and stitching over the top to create permanent folds (called pleats). There are lots of different types of pleats including single, double, French, and pencil which look fantastic in traditional and contemporary interiors alike. Pleated curtains are hung from a curtain pole with a series of curtain rings, connected to the curtains via a series of hooks. You can add as many or as few curtain rings as you like to adjust the spacing between them.

Above: From The Anvil's Beeswax curtain pole, Ball finials, curtain rings, and mounting brackets used to hang a pleated curtain.
- Eyelet curtains - this sleek, chic style of curtain uses built-in eyelets which loop onto a curtain pole. Because the eyelets are built-in, there's no need for traditional curtain rings. This means that the spacing between each eyelet remains consistent and creates a modern look, but also limits the amount you can customise these curtains.

Above: From The Anvil's Pewter Monkeytail curtain finials, curtain pole, and mounting brackets used to hang an eyelet curtain.
- Tab top curtains - these curtains don't use any form of metal curtain rings. Instead, they have fabric tab tops which slip over the curtain pole for a simple and relaxed look. Often, tab top curtains are used for decorative purposes only because the tabs can be difficult to slide along the curtain pole when opening/closing the curtains.
Curtain Drop and Curtain Gather
Curtain drop refers to the length of the curtain. The drop length you choose will depend on the type of window you're covering and the look you want to create. For example, if you're covering a kitchen window, you may want a short curtain drop so that the curtains don't drag on the countertops. Contrastingly, if you're covering a living room window, you may want a long drop so that the curtains touch the floor to create a feeling of luxury.
Top tip: to give the illusion that your room is larger than it is, hang your curtain pole above the window frame, closer to the ceiling. This will make your ceilings appear taller.

Above: a pair of pink curtains hung using From The Anvil's Beeswax curtain hardware. They have a large drop, meaning they gently touch the floor, and a gather of approximately 2x.
Curtain gather refers to the amount of folds in your curtains. The greater the gather, the more folds or pleats in your curtains. A greater gather can be achieved by choosing wider curtains. Gather is measured on a scale of roughly 1x to 3x. This value refers to the width of your curtains compared to the width of your window.
- 1x: curtain width is 1 times the width of your window. This means that the curtain is exactly the same width as your window, so there is no gathering and the curtain sits completely flat when closed. This is a great option for modern and contemporary properties, though may not offer as much privacy as greater gatherings.
- 2x: curtain width is 2 times the width of your window so that there is a moderate gathering when the curtain is closed.
- 3x: curtain width is 3 times the width of your window so that there is a lot of gathering when the curtain is closed. Gatherings of 3x and more offer the most privacy, creating a full look which looks great in traditional and period properties.
How to Fit a Curtain Pole
There are many different window styles, sizes, and shapes, so this is just a general guide for standard windows.
Before fitting your curtain hardware, you'll need to think about the type of curtains you want to hang. Do you want light tulle curtains or weighty fabric curtains? Will you add a lining layer? What style of curtain heading do you want?
1. Choose your curtain pole.
We advise selecting a curtain pole that's as wide as your window frame, plus an additional 6-12" on either side where possible. Not only does this make your window look much grander, it also allows the curtains to be fully pushed to the side of the window when opened so there is no overhang, thereby maximising the influx of natural light.
For narrow windows with light curtains, you can use a small curtain pole fitted to the wall with a mounting bracket at each end (two mounting brackets in total). For larger windows and heavier curtains, you'll need three mounting brackets (with one in the middle of the pole). This is especially true if you use a joining bar to connect two curtain poles. Ensure the bracket is central to the pole to create symmetry. We recommend using long screws and heavy-duty fixings to ensure the brackets can support the weight of your curtains.

Above: diagram showing the potential placement of curtains (vertical lines), pole (horizontal line) and mounting brackets (circles).
2. Position your curtain pole.
As mentioned previously, positioning your curtain pole several inches above your window frame, closer to the ceiling, is a great way to make your space look larger. Position your pole at a height where you're happy with the way the curtains hang - remember to factor in the length of the curtains, plus the curtain rings, when measuring.
3. Position your mounting brackets.
Your mounting brackets should sit several inches outward from the window frame. This gives enough space for the curtains to be pushed away from the window when open. Bear in mind that your curtain pole and finials will protrude further from the window than the brackets so you'll need to factor the entire length of the pole when measuring. The position of the brackets along the pole will also determine how far the curtain can be opened, so ideally you'll want to keep them quite close to the ends (though this can vary based on personal preference).

If you have a third mounting bracket, this should be positioned inline with the centre of the window, an equal distance from the other two brackets. Again, the central bracket will determine where the two curtains will meet in the middle so it's important that it is in the middle or your curtains will be asymmetrical when drawn.
Once you've decided on the position of your brackets, use a pencil to mark the position of the screw holes on the wall.
4. Drill and plug your fixing holes
Before drilling any holes, check your walls for cables and pipes, and make sure you avoid the window lintel (a beam located above your window to support the load).
Once you're happy with the position, you can drill a small pilot hole for your raw plugs as a guide for your drill. Then use a larger drill bit to create the holes for your raw plugs. Ensure you don't drill too deep - you can use a piece of tape wrapped around your drill bit at the depth you want your hole. If in doubt, aim to make the hole smaller than you think you need it - it's easy to make a hole larger but difficult to remedy if you make it too big.

5. Fit your brackets
Once your holes are drilled and your raw plugs have been inserted, you can attach your brackets (if you're using three brackets, we advise starting with the middle). Hold your bracket in place and use a screwdriver to loosely turn insert your first screw. Repeat until all the screws are loosely inserted, then tighten them all until the bracket is firmly in place.
Use a spirit level to check the levelness of your next bracket(s) against the one you just fitted and adjust the position if necessary. Once you're happy with the positioning, repeat this step for your other bracket(s) until all brackets are fitted.

6. Fit your curtain pole
If you're using pleated curtains with curtain rings, you'll need to make sure you attach the curtain rings to the pole prior to mounting. Ensure to keep one curtain ring positioned at each end of the pole so that when the pole is fitted, you'll have a single curtain ring on either side of the mounting brackets.
Likewise, with eyelet and tab top curtains, thread the curtain pole through all of the eyelets/tabs and ensure you keep one eyelet/tab on either side of the mounting brackets. This ensures that the curtains will remain in place when drawn.

Once the curtain is on the pole, place your curtain finials at either end and tighten via the grub screws. If you're using a joining bar, use it to connect the two poles together.

Place your curtain pole gently on your mounting brackets, ensuring there's an equal overhang on either side of the window. If you're using curtain rings alongside a third bracket, you'll want to ensure you have an equal number of curtain rings on either side of the middle bracket. Then use the Allen key provided to tighten the grub screws at each mounting bracket, starting from the middle if you have three brackets.

Top tip: when positioning your curtain pole, make sure the grub screws are facing the wall so that they're hidden from sight.
7. Attach your curtains (pleated curtains only)
If you have eyelet or tab top curtains, they should have already been attached in the previous step. If you have pleated curtains, you'll need to attach them to your curtain rings.
Gather your curtain heading into the desired pleats using the strings provided with your curtains. Tuck any excess string into the heading tape. Never cut your excess string, as you may wish to un-pleat your curtains when you come to wash them (or you may simply change your mind).

Next, place a curtain hook on roughly every fourth pleat or roughly one hook every 300mm. This is just a recommendation, you can space your hooks however you please to alter the look of your pleats - just remember to use the same number of hooks as you have curtain rings. Then simply hook the hooks onto the curtain rings.
Now, you can sit back and enjoy your newly hung curtains!

Discover our full collection of From The Anvil curtain hardware here!
Or head back to our blog for more advice and inspiration.